Guest Bedroom Re-Do {Crisp Khaki Obsession}

So, shocker of the century, I painted another room.

The last few weeks it’s been brought to my attention that I adore only a few colors in my decorating. More specifically, everything is either blue or green. This is not TOTALLY true, but its not entirely false either. So, when I happened upon a GLORIOUS color of blue, the perfect dynamic blue to paint our master bedroom, I realized that we would then have four blue rooms in our house (not counting the blue green of my office). And that is a bit silly, if I do say so myself.  Which got me to thinking: if I really loved this dynamic blue color and it was really worth the sacrifice, maybe I could make some extra projects out of it!

Enter, the guest bedroom. This room wasn’t ever painted by us. We just left the cute powdery blue from the previous owners. It originally was a child’s bedroom, so it was a great soft color for a guest bedroom. Plus, as I mentioned, I coordinate pretty well with blue and green. But because we’d never painted it, I figured it would be the first room to change. And you know what, there were parts of the walls that were a bit dirty. Parts that even a magic eraser couldn’t remove from the wall.  SO YOU KNOW IT NEEDED SOME LOVE.

This little project was easily knocked out in a day. I ran over to my favorite place, LOWES, and picked out some samples that I thought might work.
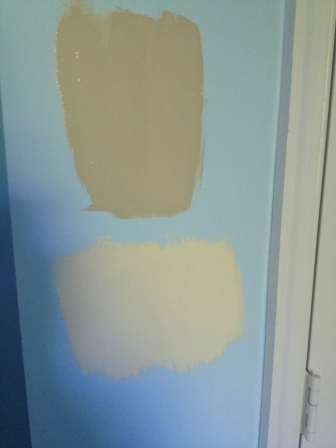
IMG_6716

UGH. I was completely wrong in that regard. I thought the top would paint and dry more tan, less muddy. NOPE. The bottom color ended up way more yellow and buttery than I expected. And then I remembered…
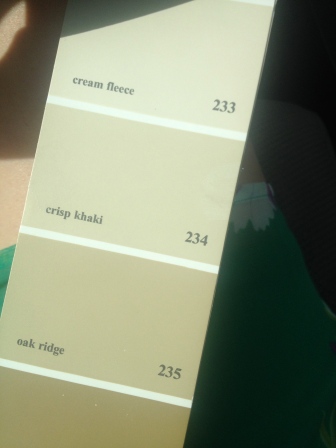
 

Ahhh, crisp khaki. The color my parents used to make their previous home more neutral. It's just the right shade of tan.

I still had that lovely Benjamin Moore fan deck. Ahhh, crisp khaki. This is the color my parents used to make their previous home more neutral. It’s just the right shade of tan and a perfect shade for a guest bedroom.

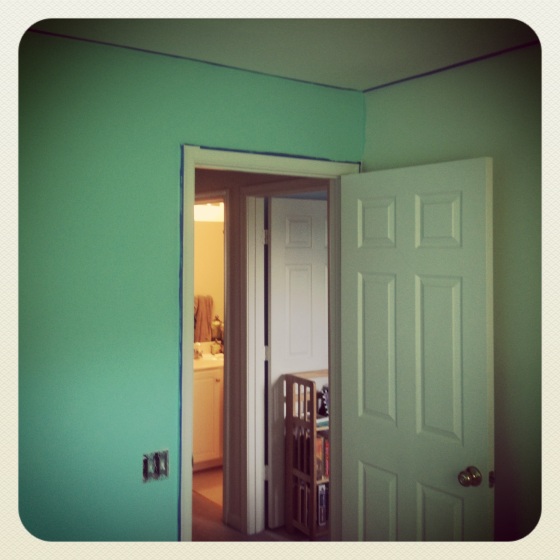
So a gallon of paint and a roll of blue painters tape later (plus an afternoon), we now officially have a crisp khaki guest bedroom. Which, truthfully, played nicely with the bedding, green mirror, and even the black of the frames on the wall and the desk/side table. And, well…it did allow me to insert a vintage green lamp into the mix as well (which is not in the picture, unfortunately). Might as well spice it up with accessories, right?!
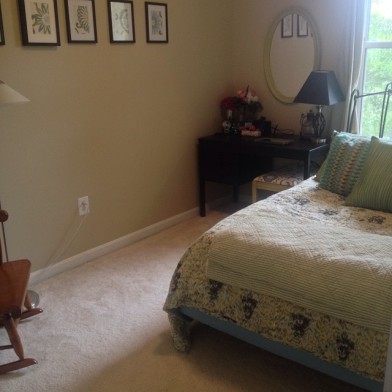
So...dare I say it? CRISP!

So…dare I say it? CRISP! I love that the colors really pop and don’t have to fight with the wall color. Plus, look at that glorious light coming in the window!

And yes, you can say I’m obsessed. Because once I painted this room, I realized I could also paint our master bath (which WAS blue) and it would look fantastic. But that’s another blog for another day…

Do you have a color you’re obsessed with and how did you manage said obsession?

XOXO,

Ashley
Bringing the Shore Back Home {Updating the Office}

Hey everyone,

Sorry for the delay but…

I did it, I finally did it! Now that we’ve gone on our summer trip for the year, which of course included a beach and water (and of course, shelling), I finally had the time to get to work on my home office.

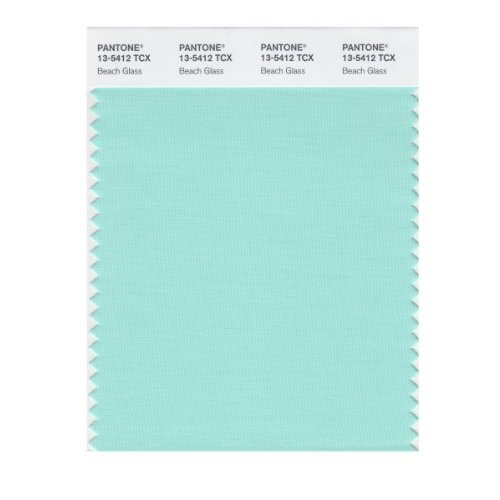
My final color choice was the lighter of the two, Beach Glass by Pantone. It had a calming tone but was still very beachy. It definitely reminded me of a happy shore house. The color, because it was Pantone, had to be the highest end paint by Valspar, which included primer as well (this ran about $31 a gallon). This was great for getting the paint on smoothly and for covering the awful color and stains from the previous owners.  I didn’t need multiple coats because the color was so vibrant and it was so easy to apply. It also was low-VOC, which is great for painting a small room in the summer heat.


41tBBYdG+nL._SS500_

See? What a lovely swatch. The perfect, shade of NOT seafoam. 


I taped, like you ALWAYS should, and ended up only needing one full day to get the paint on the walls and dried. I really didn’t need a full gallon, because I only needed one GREAT coat. I also only needed one roll of tape to get the window, doors, and ceiling/moldings. So this is was a minimal supplies needed project. Just for your information, you should always make sure when painting that you have the following (because it makes your life WAY easier):

Paint Roller

Angled Paint Brush (for corners and cutting-in)

Paint

Paint Tray with Removable Liner (makes clean up easy)

Tarp/Plastic Covering

Tape

The brush, roller, tray, and liner all came in a great kit that I picked up at Lowes. Saved me a ton of time and money, and now I have these supplies for future projects! So little stress, low cost, few supplies but a definite re-do! Whether or not I’m totally satisfied with the color is yet to be determined. It required a lot of trust on my part. When I got two of the walls painted, I quickly realized just how bright the color was. It’s shockingly aqua, a lot less beachy than I expected.


See the difference? Holy moly! It almost pales the original green because it's so bright.

See the difference? Holy moly! It almost pales the original green because it’s so bright.


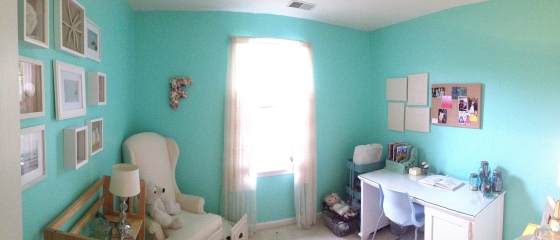
Once I finally got through all the walls, it took all my patience to not start hanging my shadow boxes and framed prints right away. I was hoping that with things on the wall, furniture in the room, and drapes on the window, the color will be a bit less abrasive. This proved to be MOSTLY true and I’m just going to live with the color for awhile and decide my next steps. But here, for your enjoyment, my nicely staged home office with the new colors, hung pictures and shadowboxes, and furniture in place. Thoughts?


See how small this room is and how intense the color can be? This is an ALMOST 360 of the room. I've got space for my sewing cart (next to my desk), my high back chair, and all my shells on the floor...ignore those.

See how small this room is and how intense the color can be? This is an ALMOST 360 of the room. I’ve got space for my sewing cart (next to my desk), my high back chair, and all my shells on the floor…ignore those.


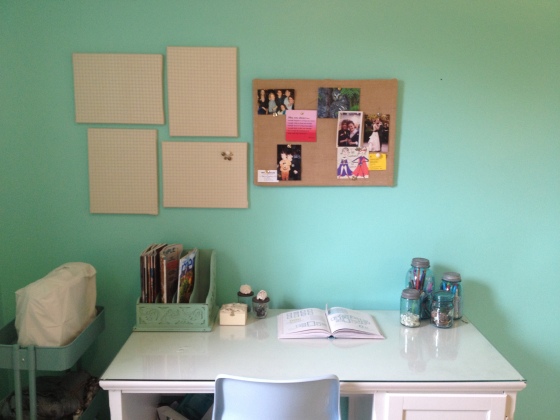
I made those matching canvas pin boards with just canvas and beige/metallic polka dotted fabric. We've had them since our first place and because they're a neutral, they can always find a home somewhere. I also took my old, white spray painted cork board and covered it in burlap for a more beachy cork board.

I made those matching canvas pin boards with just canvas and beige/metallic polka dotted fabric. We’ve had them since our first place and because they’re a neutral, they can always find a home somewhere. I also took my old, white spray painted cork board and covered it in burlap for a more beachy cork board. I’m using my flea market find to file my design magazines (see left of desk) and my colored mason jars for supplies that need to be right at arms length. 


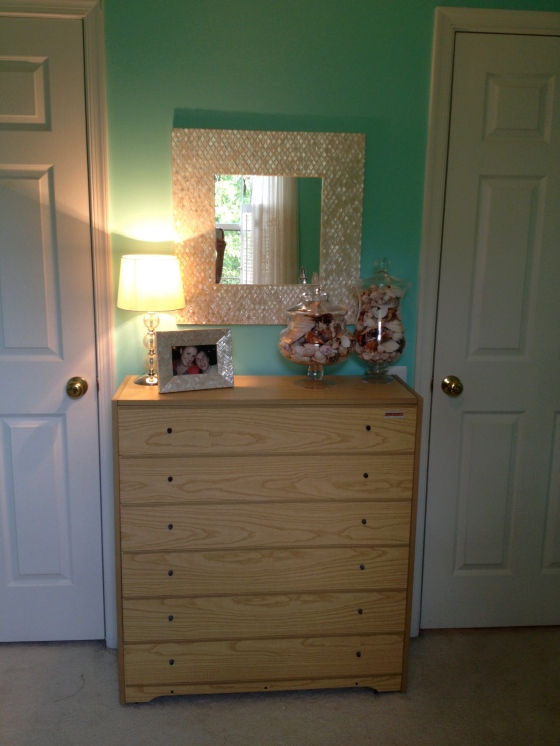
This is one of my favorite spots in the room. That piece of furniture is NOT a chest of drawers. It IS however, a mini-murphy bed. My office will always have to do double-duty and include some form of guest accommodations.

This is one of my favorite spots in the room. That piece of furniture is NOT a chest of drawers. It IS however, a mini-murphy bed. My office will always have to do double-duty and include some form of guest accommodations. The mirror was a clearance find at Homegoods, and with its capiz shell pattern is perfect for the space. It even matches our little frame and lamp. Oh, and of course, my apothecary jars filled to the brim with shells.


My reading corner...sans books. I finally did my last purge of college textbooks and now have plenty of space for my design books!

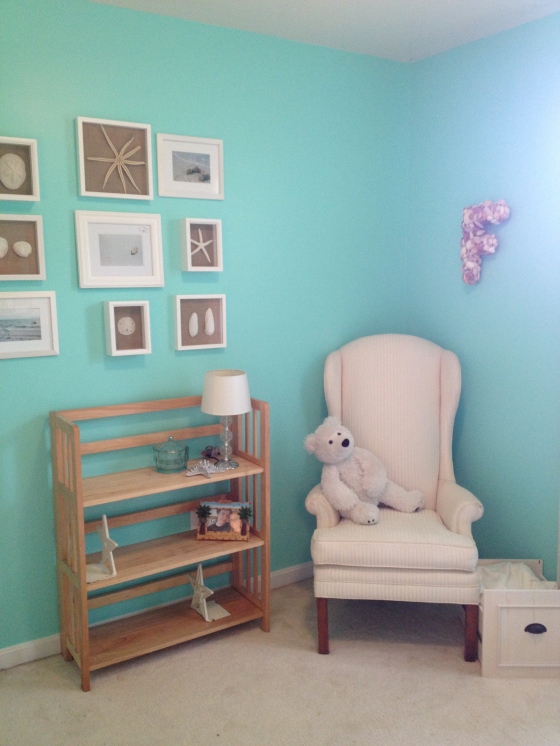
My reading corner…sans books. I finally did my last purge of college textbooks and now have plenty of space for my design books! The bear has made it ten years, and hopefully if I can keep it away from Truman, it will make it ten more! It’s sitting on the chair that I received from my grandmother earlier this year. The wall is now full with a collage of my shadow boxes and personal photography. Plus, I hung my shell covered “F” in the perfect place. It’s one of the first things you see when you walk into the room. That little box next to the chair is an unfinished project, but I promise to update you on its new life very soon!


XOXO,

Ashley

A Little Love {For Young House Love}

Hey all,

If you’re anything like me, and you’ve stumbled upon the amazingness that is Sherry and John’s blog, you were giddy like a kid on a snow day (NEMO reference!) when they announced that their book was coming out. Their blog is so interesting and witty. It makes you feel like the Petersiks are just having a conversation with you, their best friend. They share little nuggets of their lives (including their adorable daughter, Clara and their sweet pup, Burger). They also share some killer DIY tips for sprucing up your home. I am in awe of the different projects they have tackled in their two homes. It gives me hope that I could tackle a kitchen or bathroom remodel in the future.

So back to the book. I immediately made it very clear that I, too, needed this book. It didn’t matter what the content was, or when it was coming out, I must have it. So when they announced on their blog that it would be 200+ of their favorite DIY tips, I was sold. Get me a copy ASAP! I asked for it for Christmas, but no luck. So I saved up my shekels and ran on down to my local B&N to pick the sucker up.

It's mine! It's all mine!

It’s mine! It’s all mine!

I was so excited, that I’ve already finished going through all the tips. Can I just say, this book is amazing! If you are a home/entertaining/organizing DIY-er, it’s a necessary purchase. Not only is the Young House Love writing style still obvious throughout it’s pages, the tutorials are easy to follow. They created a cost, work, and time key so you know what you’re getting into before you start. Burger even makes an appearance every few pages with a witty comment bubble. And, this book was a super ego booster because I’ve actually DONE some of these projects, so I must be as cool as YHL-ers (or at least a fraction of cool).

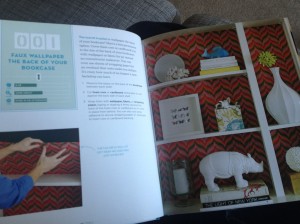
Remember last summer when I papered the back of my bookshelf? Well, right off the bat, we’ve got a match!

Great way to start, with a project I've already completed!

Great way to start, with a project I’ve already completed!

So if we’re on the same page, right at the beginning, then we’re good to go. Way to make me feel awesome, Petersiks! And then they included several tutorials on sprucing up an old mirror (remember these guys?) and they painted a set of curtains (like these!). So I felt really awesome about myself, while reading an awesome book.

They’ve also basically filled my spring break and summer break with great, future project ideas. Now on tap for the future I’ve got: stenciling a rug (tip no. 002), no sew curtains (tip no. 009), stencil a table runner (tip no. 058), make drawer shelves (tip no. 071), and fabric art piece for bedroom art (tip no. 129). But that’s only in the first half of the book!

I should mention, they also give great tips and ideas that are not necessarily DIY-ing your home. They give great tips for entertaining, for updating kitchens on a budget, and decor ideas to spruce up any room. I read through the book like a Real Simple magazine, in awe of the beautiful photographs and great writing. There were many times, and I mean MANY, when I wanted a little cheat sheet of where to buy what. I thought I was just going to have to go it alone, until I got to the end of the book! They provide a TON of great blogs, websites, and magazines for readers use. They also have a “where did you get that” section for the different illustrations and photographs. Too…perfect. I could go on and on and gush for days about this book, but you should just do yourself a favor and go buy your own copy. Do it, like right now.

XOXO,

Ashley

Visiting IKEA {They Never Cease to Amaze}

I had the opportunity to run into our local IKEA for an hour during the week. And if that is an available option, I’m obviously going to take it! Especially since I haven’t been able to see all the amazing things they put into their new catalogue. So here are some of my favorite finds from my whirlwind trip…

I love the bold wall color. Wish I could put a color like this somewhere in our house! The rest of the room is meh; I just loved the peacock blue.


This guy’s color does not come through on the picture. He was a peacock-y blue and adorable. He was also “temporarily oversold” so other people must have loved him as much as I did. He’d make a great coffee table or awesome side table for someone going for a more industrial look!


Look at the little tufting on the back of this chair! Very stylish IKEA, way to go. Not to mention that this chair was super comfortable. Yes, I was one of those people that got onto the platform to test the chair.


I’ve decided that this is what our kitchen must look like. We’ll go dark, very contrasting counters, better metal pulls on our cabinets, and glass front doors on the uppers. I’ll take the light fixtures too, if they’re included!


This will be mine. I’ve got it on my wish list. She’s $49.99 but totally worth it. Three nicely sized shelves that are easy to get to, plus she’s on casters. Easy crafting storage that I can just wheel into the closet when giving a house tour. Done and done!


If you need a folding chair, promise me you’ll get this guy. He’s comfortable and adorable (especially for a folding chair). On top of all that, he comes in MANY colors, including high gloss/laquer colors.


Gorgeous, but at $49.99, too rich for my blood. Definitely worthwhile. It was very sturdy and glamorous in person, just not for our house (or wallets).


Overall, it was a quick, but awesome, trip. I ended up getting a few more frames for our constantly growing wall-o-art up the stairwell. IKEA has amazing frames that I adore (RIBBA style), so I just grab a few each time I go. Not only are they modern and simple, they come with a mat and are pretty affordable. I also picked up our holiday gift wrap, because IKEA shockingly has awesome wrapping options, and a lamp to put on top of our new piano. Did I mention we got a piano? That’ll have to be your tease for the next posting. Until then…


XOXO,

Ashley