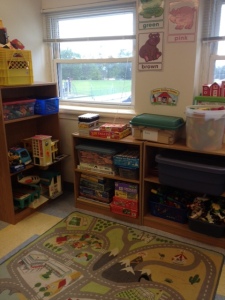
As I said in my last post, I’ve been busy planning and setting up my classroom for the little learners who were soon to enter through the doorway. I was fortunate to be able to leave many of my systems intact from last year, so many of these set up pieces did not take much time. But I wanted to give you an in-depth class tour, so you could get a feel for what my little ones get to see everyday.
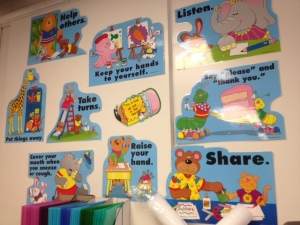
When you enter the classroom, the first wall is covered with ways we act in the classroom. This is a reminder to students to share, say thank you, be kind to classmates among other things. I like to keep it right in eyeshot for the students from their tables.

I am slightly obsessed with Eric Carle. I love using his books for literacy lessons and even math lessons from time to time. This is our writing bulletin board that throughout the year will fill with the ever-expanding writing skills of the students. Not to mention, the caterpillar soon gets covered by the photographs they bring of themselves on the first day of school. This is a handy tool for substitutes to quickly match names to faces, plus a fun way to show kindergarteners at the end of the year how much they’ve actually grown.

This is my “teacher” desk. This is probably as neat as it will ever get. My big books have their own shelf and the boys’ class cubbies are next to it.
This year I tried something new when labeling their cubbies. Because I have a few students with the same name, I decided to use color labels so that they can remember that even though there are two Aryehs, one is green and one is yellow. This is also helpful for the students who may not have name recognition skills yet.
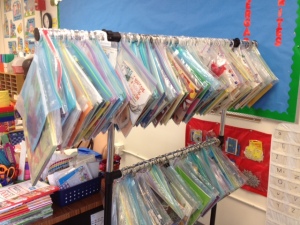
This is my listening library. It’s probably the BEST organizational tool I’ve created. I have the books organized by subject matter, specifically by our reading units.
This tool has been invaluable to me. Last year the previous teacher shoved all hers/my books onto small shelves by author. I would have to scramble and search to find the right kind of book each day and it took way too much time to prepare. I decided to create this unit and have it right in my classroom for easy access and another way that a substitute can add in extra easy activities, should she get through everything that I’ve left for them to do.
To make this unit yourself, buy a double bar clothing rack (it doesn’t have to be an expensive one, but do make sure it’s not flimsy, there is a lot of weight it will need to hold). Once you have assembled the rack, you can start organizing your books. However you choose (by author, content, etc.), I find that dividing each section is easily done with a binder clip on the last book bag of the bunch. Put each book and cd/tape into a large freezer style plastic bag, zip shut. One-hole punch the corner of each bag and feed the loop through the hole. You can use either the metal flashcard rings to hang the books, which works fine but can be kind of expensive, or you can buy plastic shower curtain rings in bulk for super cheap. Each of my packs of rings (16 per pack) were only $1 from Target.
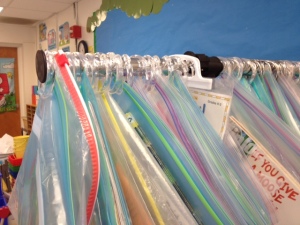
Here’s an up-close look at the bags. They all fit nicely, have enough support from the ring, and because you actually hole punch the bag (not just rip through it with the ring) it won’t rip off the bar.
And now that I’ve rambled on about the listening library, let’s continue the tour.
I try to label all the containers with the name of the toy that it houses plus a picture so that the students can match the toy to the picture. This is an easy way for fast playtime clean ups. I’ve also tried to label specific shelves so that the students know where to put the containers back after cleaning up.
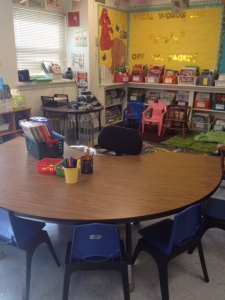
Over the last four years I have worked hard to build my classroom library. Be it from goodwill and other second hand stores, retired teachers, or freecycle, I made sure that my students had access to as many different types of reading materials as possible. I have a laminated card on each basket with a label sticker for the type of book that belongs in the basket. This is a great sorting tool and practice for the students to see the label and match it to the sticker on the book.
This is just a piece of the classroom library because I also wanted you to see my seminar table. I use this table for reading groups, assessments, and make up work. I make sure to have enough materials on the table for each child. Behind the library and table, the bright yellow bulletin board is the future home for all of our sight words that we learn throughout the year. The caption for this bulletin board? “These words are jumping off the pages!” The positioning of this board is GREAT for reading groups, because we can use it for reading the room without distracting other groups. Also, if a student gets stuck they can use it as a tool to remind themselves of the words we’ve learned and what they look like. The seminar table is also perfectly placed that I can quickly access the students completing computer games or at the listening library. This way I’m available to many students for technology trouble-shooting and for questions about directions.
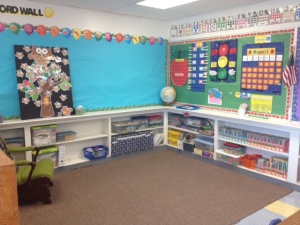
This is our circle time spot. My big green chair is a hit with adults and children alike. It was actually my great-grandmother’s that I’ve repurposed for the perfect adult chair. We spend time practicing our letters, new high frequency words, checking the calendar and weather, as well as our literacy activities.
These shelves also house our science curriculum necessities, extra reading workbooks, and our leveled readers for our current reading curriculum. As you can see on the top ledge, I have a globe (which comes in handy when students are confused about the setting of a story) and a BIG black board with…surprise, surprise OWLS.

This is just another high frequency word tool. I bought the black foam board from Staples. The owls and the tree all came in a bulletin board pack. I had all the pieces laminated so that they last as long as possible. Each owl has a piece of velcro attached so that students can read the word and then find where they’d like to fly the owl to a perch (the other side of the velcro is attached to the foam board). It’s a fun, hands-on activity that allows students to move around during circle time. This is set up with all the words we will learn by June.
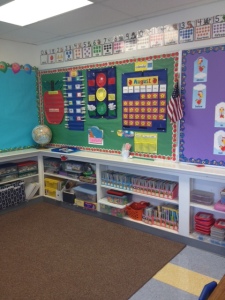
From left to right: the apple is the home to our letters we’re practicing (handwriting and phonemic awareness) as well as our word of the week, the blue rectangle is where students can check to see what their job is for the week, the stop sign is our behavior management chart, and the calendar is where we count the days we’ve been in school and practice our knowledge of the days of the week.
We changed our behavior plan a bit from last year, to hopefully make it a more concrete plan for the students. We have three levels for the students: green (doing great!), yellow (stop and think), and red (let’s do better). Last year each student had their own set of cards in a chart, so as they switched through the levels we had to find their name and shuffle through the cards. It didn’t seem immediate enough for an impact and it was not as effective as it could be. This year our home is that with the little sticks, students physically move through the colors an see themselves ON the levels, as opposed to a card symbolizing their level. My only worry is for those students who end up on red ( 😦 ) by themselves and are embarrassed because everyone else is in the green pocket. I’m not in the business of shaming kids into behaving, I just don’t do that. So if it turns out that they feel that way, I may go back to the card system. It’s all about the kids learning to be in school (and being comfortable in the classroom), not about them being embarrassed or anxious.
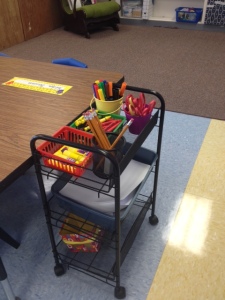
At each table (I have three tables of about six students) I have a supply cart. These are great because they hold just the right amount of supplies, can be rolled away when we need more space, and they’re easily accessible by the students. Each table has a pail of markers, pencils/erasers, scissors, glue, and two baskets of crayons. Underneath the supply shelf is a tub of scrap paper for coloring. On the bottom shelf are their charts for the behavior plan. At the end of each day (or morning for my boy’s class) they color in the square for that day. After two weeks, these charts go home to parents. This way the parents also get an idea of how their child’s behavior is in the classroom.
So that’s around the room for now 🙂 All is super neat because, well, the kids hadn’t gotten to the room at that point. Though it does look pretty okay still! What do you think?
XOXO,
Ashley
